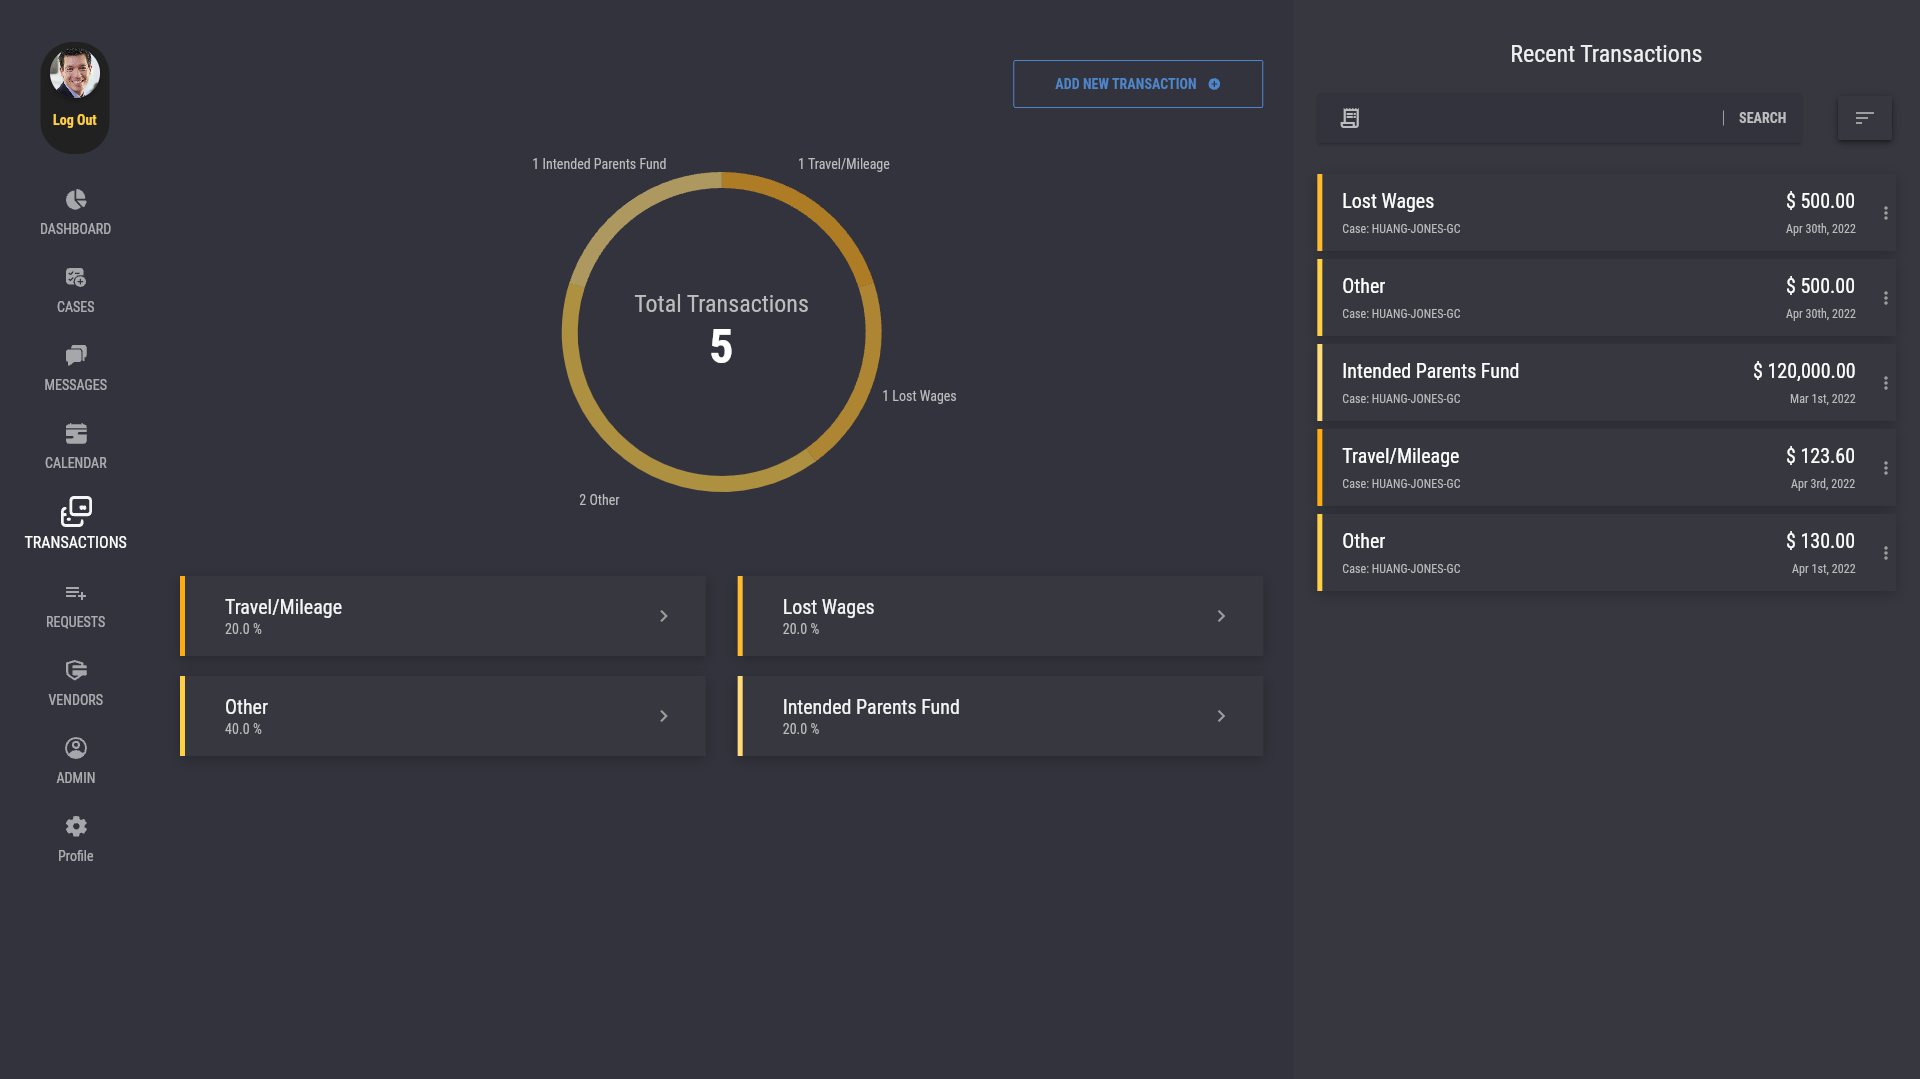
The "Transactions" tab takes the user to the "Transactions" page. The "Transactions" page consists of an "Add New Transaction" button, a pie chart of the user's transactions in the main view, categories of existing transactions, as well as a list of transactions in the secondary section. Transactions are displayed as "Transaction Tiles" in the transaction list. Each Transaction Tile contains the transaction's category, case information, amount, and date.
The "Add New Transaction" button takes the user to the "Request" tab and allows the user to request a new transaction.
The pie chart provides an overview of the user's existing transactions, showing the total number of transactions, as well as how many transactions there are for each category.
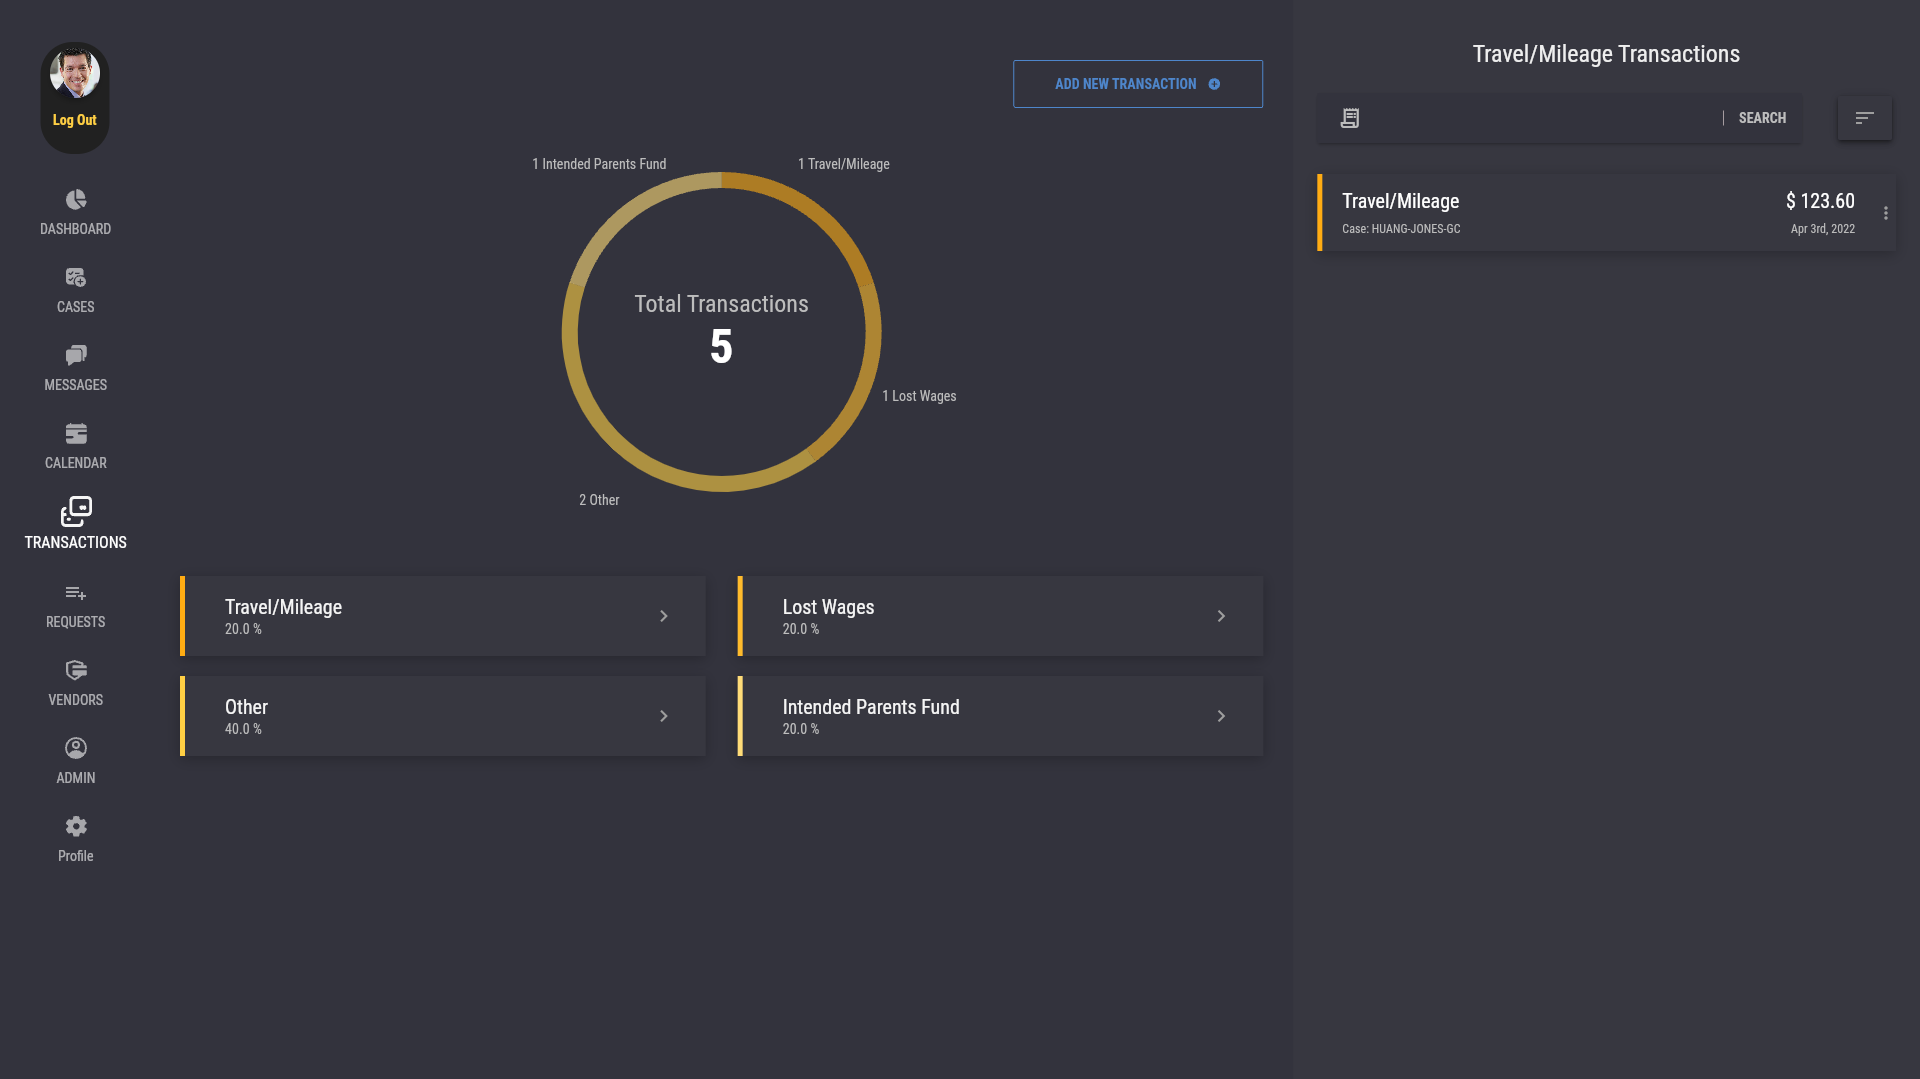
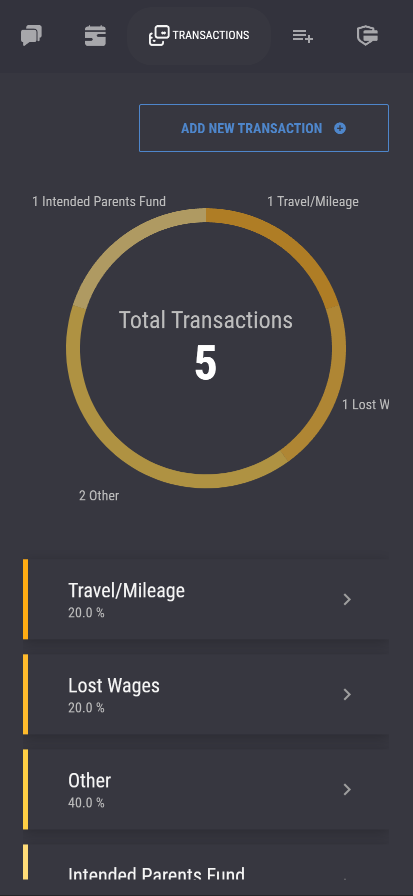
Below the pie chart is the "Transaction Categories" tiles. Each tile shows the percentage of transactions that are in that category. The user can press the "Transaction Category" tiles to view all the transactions in that category. In desktop mode, the transactions of the selected category are displayed in the right sidebar. In mobile mode, a new window containing transactions of the selected category would open.

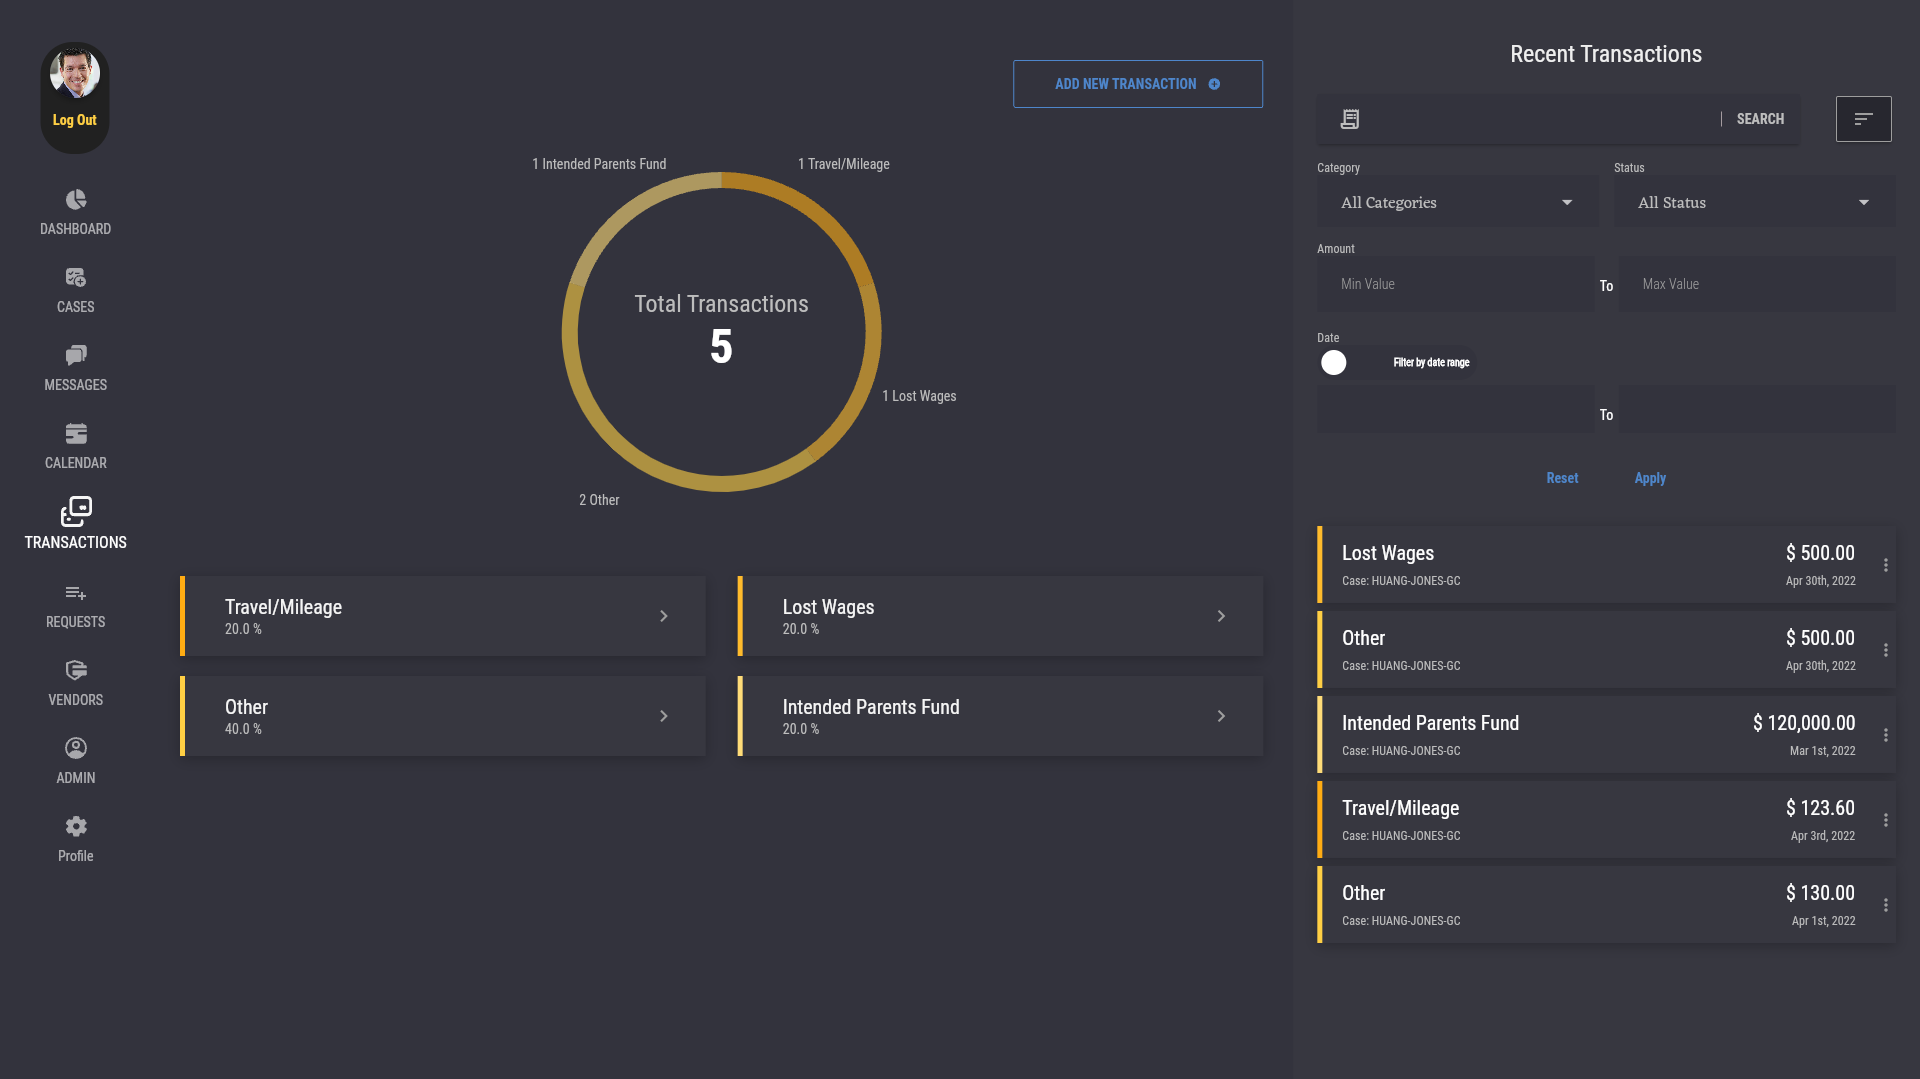
In the desktop mode right sidebar, you can use the search bar to search your transactions by typing in the name of the sender or the receiver. You can also press the ![]() button to open the filter panel. Here you can filter your search result with your specified filter, including "Category", "Status", "Amount", and "Date". You can also switch between "date range mode" and "exact date mode" for the "Date" filter. Use the "Apply" button to apply your filter, and use the "Reset" button to reset the filter.
button to open the filter panel. Here you can filter your search result with your specified filter, including "Category", "Status", "Amount", and "Date". You can also switch between "date range mode" and "exact date mode" for the "Date" filter. Use the "Apply" button to apply your filter, and use the "Reset" button to reset the filter.
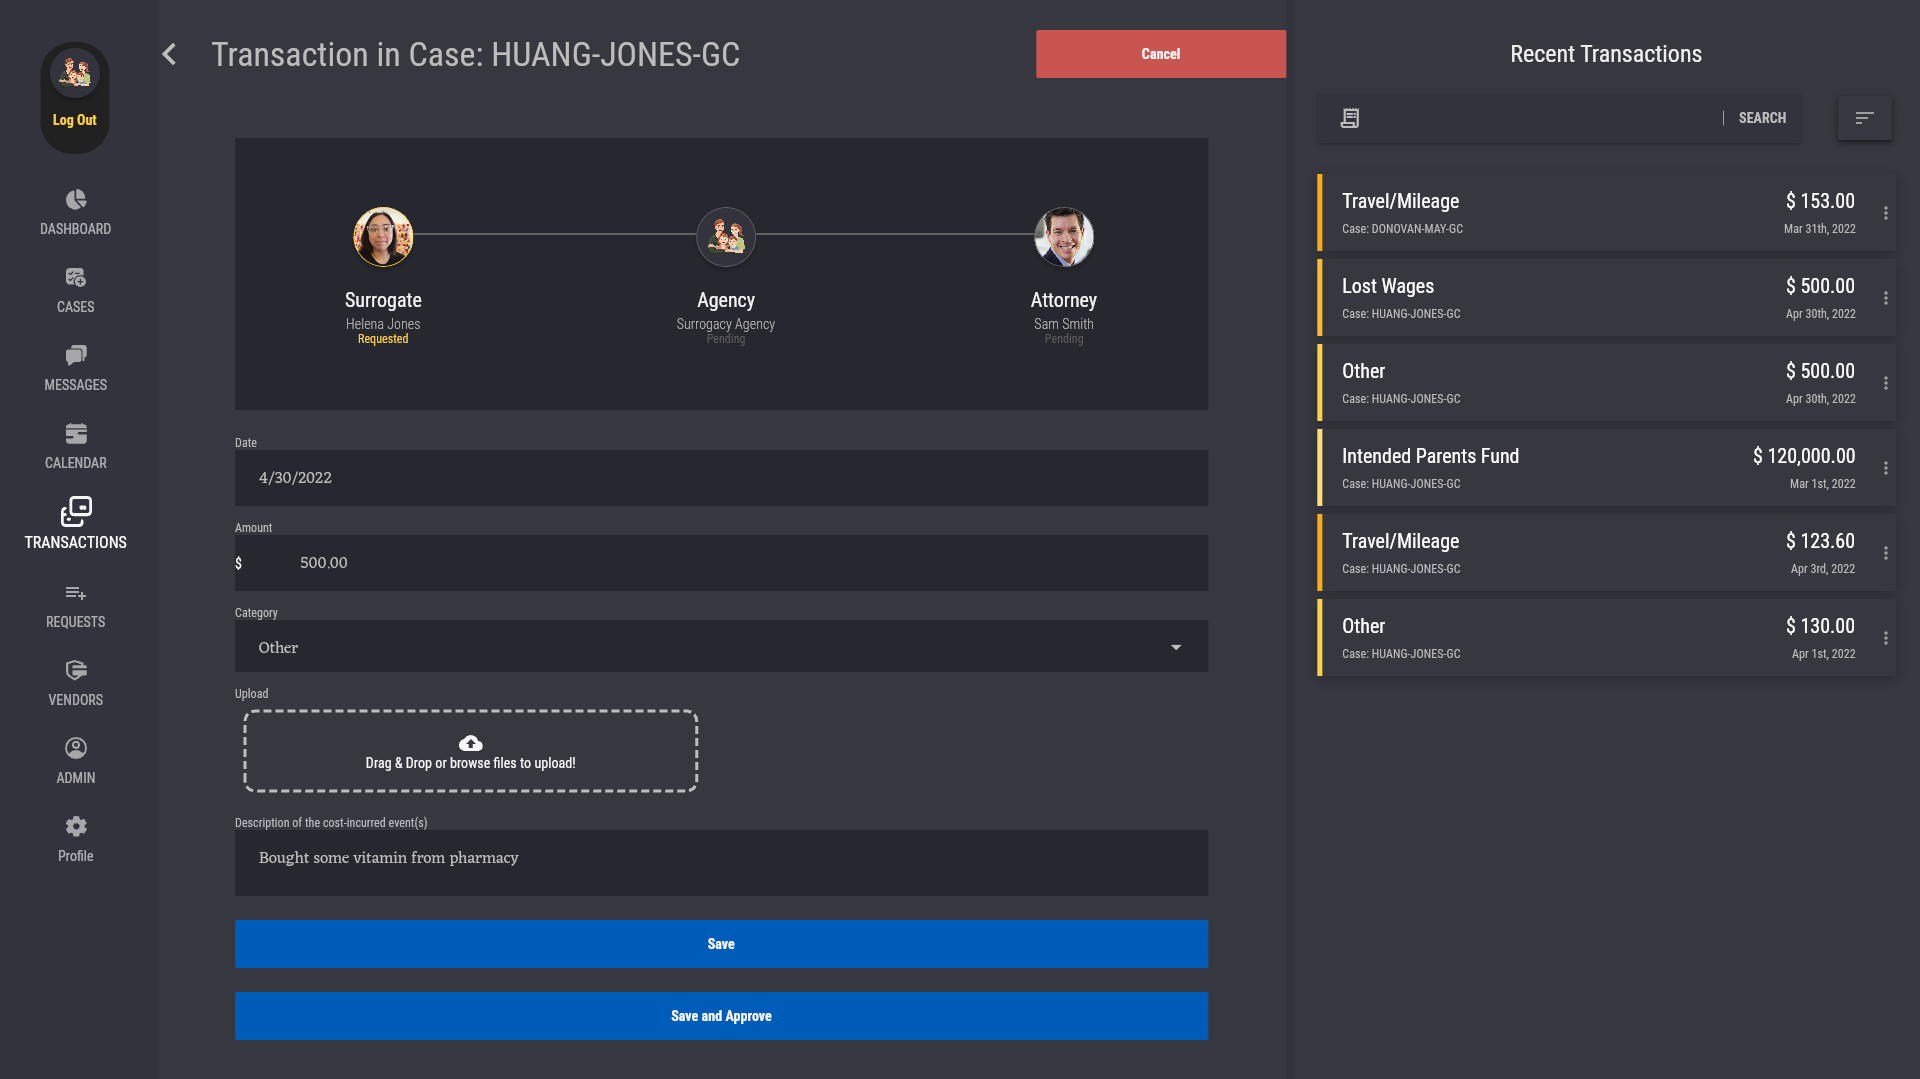
Clicking on a Transaction tile will open a new window containing the details of that transaction, called the "Transaction Detail" page. You can view the transaction's Members, Date, Amount, Category, and Description. Eligible users are able to approve or reject the transaction by pressing the "Approve" or "Reject" button, and pressing "Yes" in the subsequent confirmation dialog.

If you need to edit a transaction, press the "Edit" button on the "Transaction Detail" page to go to the "Edit Transaction" page. You may also enter the "Edit Transaction" page directly through the ![]() button on the right of a Transaction tile. Note that not all transactions can be edited. For more details about when a transaction is editable, see Introduction to Transactions.
button on the right of a Transaction tile. Note that not all transactions can be edited. For more details about when a transaction is editable, see Introduction to Transactions.
On the "Edit Transaction" page, you can update the properties of the transaction. Click the "Save" button when you're finished editing, or click the "Cancel" button to cancel your edit and go back to the "Transaction Detail" page. You can also click the "Save and Approve" button to approve the transaction with your updated information in one click.
|
Rate this Topic:
|
|||
|